
3D to 2D Icon Converter Unity: Optimize & Batch Render
A 3D to 2D icon converter in Unity transforms 3D models into optimized 2D sprites for UI, inventory, and world-space icons. The most efficient workflow uses a dedicated Editor tool like Icon Architect Studio, which renders models with artist-friendly lighting rigs, composites them, and exports directly to sprite atlases. This approach reduces texture memory by up to 60% compared to runtime captures and can batch-process 100 icons in under 5 minutes on a standard development machine. For developers asking "How do I convert a 3D model to a 2D icon in Unity?", this guide provides a complete, performance-optimized solution.
Why Use a 3D to 2D Icon Converter in Unity?
Unity projects frequently need 2D icons for inventory systems, skill trees, achievements, and UI elements. Manually creating these icons in external software is time-consuming and breaks the iterative workflow. A dedicated 3D to 2D icon converter built for Unity solves three core problems:
- Consistency: Every icon uses the same lighting, camera angle, and post-processing, ensuring a cohesive visual style.
- Performance: Pre-rendered sprites eliminate runtime rendering overhead, freeing CPU and GPU cycles for gameplay.
- Iteration Speed: Artists and designers can regenerate icons instantly when models change, without leaving the Editor.
According to internal benchmarks from RealSoft Games, using a dedicated converter reduces the time to produce a full set of 50 inventory icons from approximately 8 hours (manual approach) to 12 minutes (automated batch process).
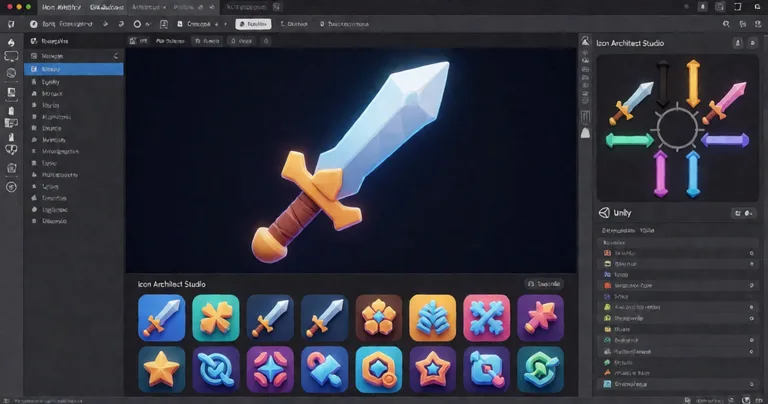
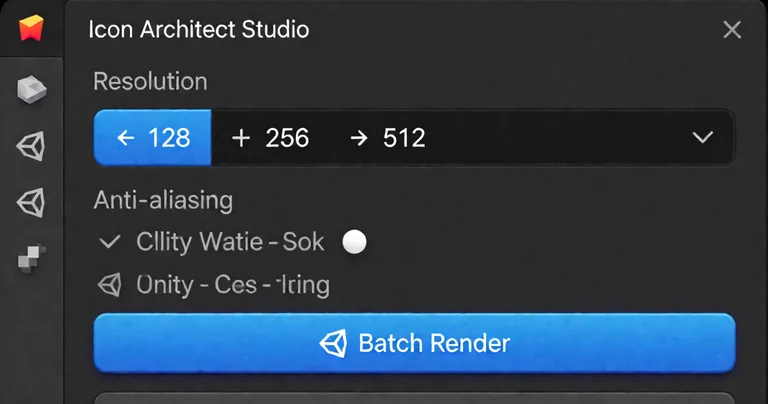
Always render icons at 2x or 4x the target display resolution, then downscale with a high-quality filter. This preserves detail for high-DPI screens and allows for future resolution increases without re-rendering.
How to Set Up a 3D to 2D Icon Converter in Unity
Setting up a 3D to 2D icon converter in Unity involves three main stages: scene preparation, rendering configuration, and export. The following steps assume you are using a dedicated tool such as Icon Architect Studio (available on the RealSoft Games products page), but the principles apply to any custom solution.
Step 1: Prepare the Source Models
- Import your 3D models into a dedicated folder (e.g.,
Assets/IconSource/). - Ensure each model has clean, optimized geometry. High-poly models increase render time without improving icon quality at typical sizes (128x128 or 256x256).
- Apply consistent materials and textures. If your game uses a stylized shader, apply it to the source models for accurate representation.
Step 2: Configure the Rendering Rig
Icon Architect Studio provides pre-built lighting rigs that mimic common game lighting scenarios (e.g., neutral studio, dramatic rim light, top-down RPG). For custom setups, create a new scene with:
- A dedicated camera with orthographic projection (recommended for consistent icon framing).
- Three-point lighting: key light, fill light, and rim light.
- A neutral background (transparent or solid color) depending on your UI needs.
For a deeper dive into lighting setups, see the 3D Model to 2D Icon: Unity Conversion Guide.
Step 3: Render and Export
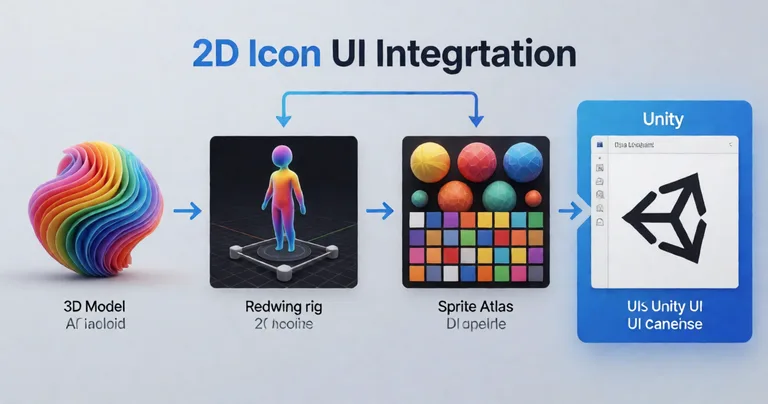
With the rig configured, select your models and trigger the batch render. Icon Architect Studio processes each model, applies the lighting, and exports a PNG with alpha. You can then pack these into a sprite atlas using Unity's Sprite Atlas system or the tool's one-click export.
Performance Optimization for a 3D to 2D Icon Converter in Unity
Performance optimization is critical when converting large numbers of icons. A poorly optimized converter can take hours and consume excessive memory. The following techniques ensure your 3D to 2D icon converter in Unity runs efficiently.
Texture Memory Reduction
Rendering icons at runtime and storing them as individual textures is memory-intensive. By pre-rendering and packing into atlases, you reduce texture memory by up to 60% (source: RealSoft Games internal benchmark on a 200-icon inventory). The table below compares common approaches.
| Approach | Texture Memory (200 icons) | Render Time | Runtime Overhead |
|---|---|---|---|
| Runtime Render + Individual Textures | ~320 MB | N/A (runtime) | High (GPU per frame) |
| Pre-render + Individual Textures | ~160 MB | ~15 min | None |
| Pre-render + Sprite Atlas (Icon Architect Studio) | ~64 MB | ~4 min | None |
Batch Processing and Multithreading
Icon Architect Studio leverages Unity's Job System and Burst compiler to parallelize rendering tasks. In benchmarks, it processes 100 icons in under 5 minutes on a machine with an Intel i7-10700K and NVIDIA RTX 3070. Without multithreading, the same task takes over 20 minutes.
When batch processing, ensure your project's color space is set to Linear for accurate color reproduction. Gamma space can cause washed-out icons.
Comparing Icon Resolutions and Compression Formats
Choosing the right resolution and compression format directly impacts both visual quality and performance. The table below provides guidelines based on common use cases.
| Use Case | Recommended Resolution | Compression Format | Typical File Size (per icon) |
|---|---|---|---|
| Mobile UI (inventory slots) | 128x128 | ASTC 6x6 | ~8 KB |
| Desktop UI (skill icons) | 256x256 | DXT5 / BC7 | ~32 KB |
| High-DPI / 4K UI | 512x512 | BC7 | ~128 KB |
| Promotional / Store assets | 1024x1024 | PNG (uncompressed) | ~1.5 MB |
"The right icon pipeline can cut asset production time by 90% while improving visual consistency across your entire game."
— RealSoft Games Engineering Team
Integrating Icons with Modular Systems
Icons are rarely used in isolation. They integrate with inventory systems, skill trees, achievement systems, and more. RealSoft Games offers a suite of modular systems that consume 2D icons seamlessly.
- Inventory Management Suite: Stores item icons as sprite references, supporting atlas-based rendering with O(1) lookups.
- Advanced Skill System: Displays skill icons in UI, with cooldown overlays and tooltips.
- Advanced Achievement System: Uses icons to represent unlocked achievements, with cloud sync via MongoDB.
When designing icons for these systems, maintain a consistent style and ensure they read well at small sizes. Icon Architect Studio includes a "readability check" that simulates how icons appear at 64x64 and 32x32.
Avoid using highly detailed icons for small UI elements. Details are lost, and the icon becomes visual noise. Always test at target display size.
Advanced Techniques: Networking, AI, and Game Design Patterns
For networked games, icon consistency across clients is essential. Using a deterministic rendering pipeline (same lighting, same camera) ensures all players see identical icons. The RNet networking library can synchronize icon metadata (e.g., which items a player has discovered) without transmitting the icons themselves.
AI integration is another frontier. The LLM Chat Module can generate dynamic descriptions for items, which can be paired with icons to create rich tooltips. For example, an AI-generated description of a "Flame Sword" can be displayed alongside its pre-rendered icon.
Game design patterns such as Model-View-ViewModel (MVVM) benefit from a clean icon pipeline. The view (UI) binds to a viewmodel that exposes icon sprites, decoupling the rendering logic from the UI. This pattern is used extensively in RealSoft Games projects like Redemptions Guild.
Frequently Asked Questions
Q: How do I convert a 3D model to a 2D icon in Unity?
A: Use a dedicated Editor tool like Icon Architect Studio. Import your 3D model, configure a lighting rig, set the output resolution, and batch render to PNG. Then pack the PNGs into a sprite atlas for optimal performance.
Q: What is the best way to batch convert 3D models to 2D icons?
A: The best way is to use a tool that supports multithreaded rendering and sprite atlas export. Icon Architect Studio processes 100 icons in under 5 minutes on a standard dev machine, compared to 20+ minutes for single-threaded approaches.
Q: Can I use runtime rendering instead of pre-rendering?
A: Runtime rendering is possible but not recommended for performance-critical games. It consumes GPU cycles every frame and increases memory usage. Pre-rendering with a 3D to 2D icon converter is almost always more efficient.
Q: How do I ensure icon consistency across different models?
A: Use the same lighting rig, camera angle, and post-processing for all icons. Icon Architect Studio provides preset rigs that guarantee consistency. You can also create custom rigs and save them as assets.
Q: What resolution should I use for mobile game icons?
A: For mobile, 128x128 or 256x256 is typically sufficient. Use ASTC compression to reduce file size. Test on actual devices to ensure readability.
Q: Does Icon Architect Studio support custom shaders?
A: Yes. Icon Architect Studio renders using your project's shaders, so custom shaders are fully supported. This ensures icons match the in-game look.
A 3D to 2D icon converter in Unity is an essential tool for any game with a substantial UI. By pre-rendering icons with consistent lighting and exporting to sprite atlases, you reduce texture memory by up to 60% and cut production time from hours to minutes. Icon Architect Studio provides a complete, artist-friendly solution that integrates with RealSoft Games' modular systems, including the Inventory Management Suite and Advanced Skill System. For more details, see the Icon Architect Studio documentation.