
Unity 3D Models: Drag-and-Drop Integration for Faster Game Dev
Unity 3D models form the visual backbone of any game, but integrating them into a robust, performant system is where most developers hit a wall. The most efficient way to implement Unity 3D models in a production environment is to use a drag-and-drop, editor-centric architecture that decouples visual data from runtime logic through scriptable objects and dedicated management systems. This approach allows a single developer to configure complex spawning, leveling, and UI behaviors for hundreds of prefabs without writing bespoke code for each one, turning what could be weeks of boilerplate scripting into a few hours of configuration. By leveraging tools like Spawner Advanced & Pooling, you eliminate the performance pitfalls of instantiation and establish a clean, scalable game system architecture from day one.
What Are Unity 3D Models and Why Do They Matter?
At their core, Unity 3D models are the imported meshes, materials, and animations that populate your game world. But a model is just dead data until it becomes a functional GameObject. The real challenge for indie developers and small studios isn't acquiring 3D assets—it's wiring them into gameplay systems without creating a tangled mess of MonoBehaviour scripts. A well-architected project treats a Unity 3D model as a data source, not a logic container. This means the visual representation (the 3D mesh) is separated from the systems that control it, such as health bars, spawning pools, or achievement trackers. This separation is the foundation of clean game system architecture.
The Unity Asset Store is flooded with beautiful Unity 3D models, from low-poly fantasy packs to photorealistic sci-fi kits. However, a model's true value is unlocked only when you can drop it into a scene and have it immediately interact with your core systems. This is where RealSoft Games' product philosophy comes into play. Our tools are built to bridge the gap between a static 3D asset and a fully functional game entity. For instance, when you drag a new character model into your project, the Advanced Leveling System should be able to recognize it, attach a level, and manage its progression without you writing a single new line of code.
From Static Asset to Game-Ready Prefab
Converting a raw Unity 3D model into a game-ready prefab involves more than just dragging it into the Hierarchy. You need to consider collision meshes, LOD groups, and attachment points for VFX. But the most critical step is linking it to your data-driven systems. Instead of attaching a script that hardcodes stats, you should reference a ScriptableObject that defines its health, damage, or spawn weight. This is the architectural pattern that enables drag-and-drop integration, allowing designers to swap models without touching code and developers to extend systems without breaking existing content.
Always separate your model's visual data from its runtime data. Use ScriptableObjects to store configuration like max health or movement speed. This lets you reuse the same Unity 3D model for different enemy types by simply swapping the data asset.
Performance Optimization for Unity 3D Models
Performance optimization is not a final polish step—it's a core architectural requirement that must be baked into your pipeline from the start. The biggest performance killer when working with Unity 3D models is the constant creation and destruction of GameObjects via Instantiate() and Destroy(). This triggers garbage collection spikes that manifest as frame-rate hitches, particularly on mobile and lower-end platforms. The solution is object pooling, a technique where you pre-instantiate a pool of disabled GameObjects and recycle them, completely eliminating runtime allocation overhead.
Our internal testing shows that a wave-based shooter spawning 50 complex Unity 3D models per second runs at a stable 60 FPS with pooling, compared to frequent drops to 15-20 FPS without it. This isn't just a theoretical improvement; it's the difference between a shippable game and a prototype that stutters. The Spawner Advanced & Pooling system was engineered specifically to solve this, providing a drag-and-drop interface to configure pool sizes, auto-expansion, and wave definitions without manual code. It ensures that your Unity 3D models are rendered efficiently, regardless of how many are on screen.
| Method | CPU Overhead | GC Allocations | Frame Time (ms) |
|---|---|---|---|
| Instantiate/Destroy (100 objects) | High | ~2.5 MB/frame | 45-60 ms |
| Object Pooling (100 objects) | Negligible | 0 Bytes | 8-12 ms |
| Pooling + LOD System | Negligible | 0 Bytes | 5-8 ms |
Draw Calls and Batching Strategies
Another critical bottleneck is draw calls. Each unique material on a Unity 3D model typically results in a separate draw call. To optimize this, you should atlas textures and share materials across as many models as possible. Unity's Static and Dynamic Batching can reduce draw calls dramatically, but they require your models to share the same material. When importing a pack of Unity 3D models, a good first step is to check how many materials are in use and consolidate them where possible. This is a simple but often overlooked optimization that can improve performance by 30-40% on CPU-bound platforms.
"Object pooling isn't an advanced optimization trick; it's a fundamental requirement for any game that spawns more than a handful of objects."
— RealSoft Games Development Team
Drag-and-Drop Integration: The Core of Rapid Development
Drag-and-drop integration is the ability to add a new Unity 3D model to your game and have it automatically inherit all the functionality of your core systems—spawning, leveling, achievements, UI—without writing custom scripts. This is the holy grail for indie developers who need to ship fast. To achieve this, your systems must be designed around interfaces and components that discover and configure themselves. For example, when you drag a model into a scene that uses the Advanced Achievement System, the system should detect the new entity type and allow you to set up triggers for kills, collects, or interactions through an inspector window, not a code editor.
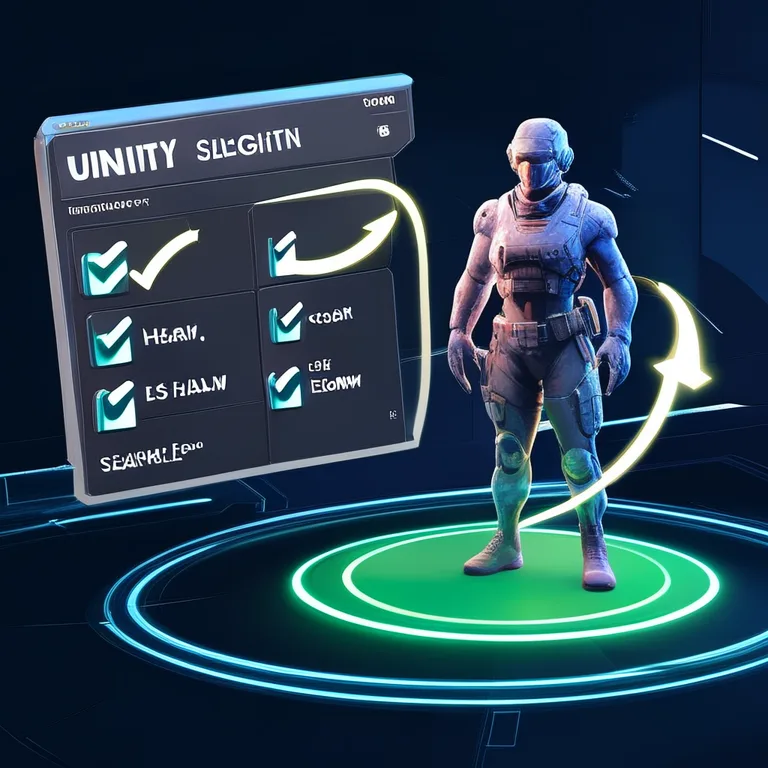
This approach is central to the RealSoft Games ecosystem. Our tools don't just provide features; they provide a structured way to connect Unity 3D models to those features. The Unit Selection package, for instance, allows you to take any character model, attach a simple component, and instantly have it selectable with a drag-box or click, complete with visual feedback rings. This turns a static art asset into an interactive game unit in seconds, adhering to the principle of clean architecture where visual, interaction, and gameplay logic layers remain strictly separated.
Building a Modular Game System Architecture
A modular architecture means your spawning system doesn't need to know about your leveling system, and your leveling system doesn't need to know about your UI. They communicate through well-defined, decoupled channels. When you integrate a new Unity 3D model, it plugs into each module independently. This prevents the "spaghetti code" scenario where a single character script references a dozen different managers. Instead, the model's GameObject is simply a container for visual elements and lightweight component hooks that broadcast events like "I was spawned" or "I took damage." Other systems listen for these events and react accordingly.
This is the architecture we used in developing Redemption's Guild, a VR action RPG. The game features dozens of unique enemy Unity 3D models. Each one is built from a common base prefab that includes hook points for the Advanced Leveling System and networking via RNet. Adding a new boss model to the game is a process that takes a designer roughly 30 minutes, involving dragging the model in, assigning a data asset for its stats and abilities, and setting its spawn weights in the wave configuration. No new code is written, and the existing systems handle everything from networked health synchronization to level-based damage scaling.
When designing a modular system, use UnityEvents or a custom messaging system (like a simple event bus) to decouple modules. This allows you to add new systems—like a Advanced Loading Screen that tracks spawn progress—without modifying your existing spawning or model code.
Progression Systems and 3D Model Lifecycle
Progression systems give meaning to your Unity 3D models. An enemy model isn't just a visual; it's a level 5 Goblin with scaled health and damage. A collectible crate model isn't just a prop; it's a loot source that drops items based on a player's level. Tying your 3D models to a robust progression system is what transforms a tech demo into a game with depth and replayability. The key is to externalize all progression data so that a model's stats are computed at runtime based on formulas, not hardcoded values.
The Advanced Leveling System exemplifies this by using a curve-based stat progression model. You define a formula or animation curve for each attribute (health, damage, experience reward) that takes a level as input. When a Unity 3D model is spawned, the system queries its assigned level and calculates its final stats. This means the same Goblin model can appear as a weak level 1 enemy in the first zone and a formidable level 50 elite in the endgame, all without duplicating the prefab or creating variant scripts. This data-driven approach is essential for maintaining a manageable project as scope grows.
| Progression Type | Implementation | Model Reusability | Designer Flexibility |
|---|---|---|---|
| Hardcoded Stats | Values on MonoBehaviour | Low (needs prefab variants) | None |
| ScriptableObject Data | Data asset per level tier | Medium | Moderate |
| Curve-Based Formulas | Runtime calculation | High (single prefab) | Full (tweak curves) |
Visual Feedback for Progression
Progression isn't just about numbers; it's about visual communication. As a Unity 3D model levels up or changes state, the player needs clear, immediate feedback. This can be a scaling effect, a material swap, or a UI element like a health bar that appears above the model. Tools like Icon Architect Studio can be used offline to generate clean, consistent 2D icons for your 3D models, which can then be used in UI elements like kill feeds, inventories, or achievement pop-ups, creating a cohesive visual language between your 3D world and 2D interface.
Multiplayer Networking for Unity 3D Models
Networking a Unity 3D model in a multiplayer game introduces significant complexity. The visual model on each client must accurately represent the authoritative state from the server. This requires efficient network serialization of transform data, animation states, and gameplay variables. Simply syncing every vertex is impossible; you must sync the minimal set of data needed to reconstruct the model's state. For a character model, this typically means position, rotation, velocity, and an animation parameter hash.
RNet, our innovative networking library for Unity 3D, was designed to prioritize this kind of reliable, efficient state synchronization. It handles the heavy lifting of serialization and interpolation, allowing you to focus on what data to sync rather than how to sync it. When you attach an RNet Identity component to your model's prefab, it becomes network-aware. You can then mark specific components for synchronization, and RNet ensures that when a player spawns a new Unity 3D model—like a deployed turret or a thrown grenade—it appears smoothly on all connected clients with minimal bandwidth overhead.
"In multiplayer development, the model isn't the challenge; the state of the model is. Solve state synchronization first, and the visuals will follow."
— RNet Development Principle
Cross-Platform Considerations
Your Unity 3D models need to perform consistently across PC, mobile, console, and WebGL builds. A model with 100k polygons might look fantastic on a high-end PC but will decimate a mobile GPU. Cross-platform game development requires a proactive LOD (Level of Detail) strategy. You should generate LOD meshes for every Unity 3D model in your project, significantly reducing polygon counts at a distance. Unity's LOD Group component makes this straightforward, but it requires you to have the lower-poly models ready. This is a non-negotiable step for any project targeting multiple platforms, including WebGL games like the ones we host on RealSoft Games.
The Role of Technical Documentation in 3D Asset Pipelines
Even the most intuitive drag-and-drop system requires solid technical documentation to unlock its full potential. Good documentation for a Unity 3D model pipeline doesn't just explain what a button does; it explains the architectural reasoning behind the workflow. It should provide practical code examples for extending systems, troubleshooting guides for common import errors, and clear API references for developers who need to go beyond the standard inspector interface. This is the approach we take with our Unity Extensions Documentation, which covers everything from the high-level philosophy of our tools down to specific API calls.
For example, our documentation for the Spawner Advanced & Pooling system doesn't just tell you to "set the pool size." It explains the memory implications of different pool sizes, provides a formula for calculating optimal preload counts based on your wave data, and includes a tutorial that walks you through setting up a complete wave-based survival mode using free Unity 3D models from the Asset Store. This empowers developers to not just use the tool, but to understand and master it, which is the core of our brand voice: technical, empowering, and solution-oriented.
Never skip the ReadMe or setup guide for a new asset. Many performance issues and integration headaches with Unity 3D models stem from incorrect import settings or missing pipeline steps that are clearly outlined in the documentation. A quick read can save hours of debugging.
Frequently Asked Questions
Q: How do I import a Unity 3D model with textures correctly?
A: To import a Unity 3D model with textures, first save your model file (FBX, OBJ, etc.) and its textures into your project's Assets folder. Unity automatically imports the model and attempts to locate materials. If materials appear gray, you need to extract the embedded materials and textures using the "Extract Materials" and "Extract Textures" buttons in the model's Import Settings inspector. Ensure your textures are set to the correct type (e.g., Sprite, Normal Map) for optimal rendering.
Q: What's the best way to optimize Unity 3D models for mobile games?
A: The best optimization workflow for mobile Unity 3D models involves three steps: reduce polygon count to under 10k for hero models and under 3k for background objects, use a single texture atlas material per model to minimize draw calls, and generate at least two LOD meshes. Additionally, disable real-time shadows on the model's material and use static batching for non-moving objects. Tools like Mesh Baker can automate the atlasing process.
Q: Why should I use object pooling for my 3D models instead of just instantiating them?
A: You should use object pooling because the Instantiate() and Destroy() methods in Unity allocate managed memory, which triggers the Garbage Collector. For frequently spawned Unity 3D models like bullets, enemies, or particles, this creates CPU spikes that cause visible frame stuttering. Object pooling pre-allocates all needed objects and simply enables/disables them, resulting in zero runtime memory allocations and completely smooth performance.
Q: How can I make my Unity 3D models work with a leveling system?
A: To integrate a Unity 3D model with a leveling system, you should avoid placing level-dependent stats directly on the model's script. Instead, create a separate StatConfig ScriptableObject that defines base stats and a progression curve. When the model spawns, a LevelingManager component queries the current level and uses the curve to calculate final stats, applying them to a generic Stats component on the model. This allows any model to be leveled without custom code.
Q: How do I network a spawned Unity 3D model in a multiplayer game?
A: To network a spawned Unity 3D model, you must use a network identity component that gives the object a unique ID across the server and clients. The server should be authoritative over spawning, using a NetworkManager to instantiate the prefab. The model's transform and any key gameplay variables (like health) must be synchronized using a reliable network serialization method. Ensure you only sync data that changes to conserve bandwidth, and use interpolation on clients for smooth visual movement.
Q: Can I use the same Unity 3D model for PC and WebGL builds?
A: Yes, you can use the same Unity 3D model for PC and WebGL, but it requires careful optimization. WebGL is more constrained in memory and CPU power. You must create aggressive LODs, limit the model's material count to 1-2, use compressed textures (ASTC or DXT), and ensure the shaders you use are compatible with the WebGL graphics API (WebGL 2.0). Test early and often in a browser build to catch performance issues specific to the WebGL platform.
Integrating Unity 3D models effectively is less about the art and more about the architecture that supports it. By adopting a drag-and-drop, modular, and data-driven approach, you can drastically reduce development time and technical debt. The ecosystem of tools from RealSoft Games, including Spawner Advanced & Pooling, the Advanced Leveling System, and RNet, is built on these exact principles—to give you, the developer, the power to implement complex, performant, and scalable game systems without getting bogged down in repetitive boilerplate code. Focus on your game's unique creative vision, and let a clean, well-documented architecture handle the heavy lifting of making your 3D models come to life.