
iOS Development Tutorial: Unity Drag-and-Drop Game Systems
Building a complete iOS game in Unity requires efficiently integrating complex systems like achievements, leveling, spawning, and UI generation without spending months on boilerplate code. This iOS development tutorial demonstrates how to leverage drag-and-drop Unity assets to construct a production-ready game architecture, cutting development time by up to 60% while maintaining the performance and clean code structure that Apple's App Store demands. You'll learn to implement progression systems, object pooling, and multiplayer networking specifically optimized for iOS devices, all through practical, copy-paste-ready code examples and a modular architecture that scales from solo indie projects to mid-sized studio productions.
iOS Development Tutorial
iOS development presents unique constraints: strict memory limits, Metal graphics optimization, and a review process that penalizes unstable builds. Traditional hand-coded game systems often introduce bugs and performance bottlenecks that only surface during App Store testing. A modular, drag-and-drop approach flips this paradigm by using pre-optimized, battle-tested components that snap together like building blocks.
"The most reliable code is the code you never have to write. Drag-and-drop systems let you focus on what makes your game unique, not on reinventing the achievement unlock logic for the hundredth time."
— RealSoft Games Development Philosophy
Consider the Advanced Achievement System — a drag-and-drop solution that integrates achievements into your iOS game with just a few clicks. Instead of writing a custom observer pattern, serialization layer, and UI notification system from scratch, you attach a single component to your GameManager and configure achievement criteria in the Inspector. This not only accelerates development but ensures the system is already optimized for iOS's IL2CPP scripting backend, avoiding common AOT compilation errors that plague hand-rolled solutions.
When targeting iOS, always test your drag-and-drop assets on an actual device early in development. The IL2CPP compiler can behave differently than the Mono editor runtime, and pre-validated assets like those from RealSoft Games have already been tested against these edge cases, saving you days of debugging obscure AOT stripping issues.

Setting Up Your Unity Project for iOS: The Modular Foundation
Before diving into specific systems, lay a modular foundation that respects iOS's resource constraints. This iOS development tutorial assumes you're using Unity 2022.3 LTS or later, which provides the most stable Metal graphics support and IL2CPP improvements for Apple silicon.
Project Structure for Scalable iOS Architecture
Organize your Assets folder to support drag-and-drop integration without creating dependency hell. A flat, feature-based structure works best for modular systems:
- Assets/_Game/Systems/ — Each drag-and-drop system gets its own subfolder (Achievements/, Leveling/, Spawner/)
- Assets/_Game/Scenes/ — Keep scenes lightweight; iOS has strict memory budgets
- Assets/_Game/ScriptableObjects/ — Configuration data lives here, not in MonoBehaviour fields
- Assets/Plugins/ — Native iOS plugins and pre-compiled DLLs
This structure directly supports the workflow demonstrated in the RealSoft Games documentation for the Advanced Leveling System, where configuration assets are separated from runtime logic, making it trivial to swap balance data without touching code.
iOS-Specific Player Settings Checklist
| Setting | Recommended Value | Impact on Drag-and-Drop Systems |
|---|---|---|
| Scripting Backend | IL2CPP | Required for App Store; all RealSoft assets are IL2CPP-tested |
| API Compatibility Level | .NET Standard 2.1 | Ensures compatibility with modular system interfaces |
| Target minimum iOS version | 13.0 | Balances reach vs. modern Metal features for UI generation |
| Architecture | ARM64 | Mandatory since iOS 11; Apple silicon optimization |
| Strip Engine Code | Enabled (with link.xml) | Critical for app size; drag-and-drop assets include link.xml templates |
Enabling code stripping without a proper link.xml file will break drag-and-drop systems that use reflection. Assets like the Advanced Leveling System include pre-configured link.xml templates — always copy these into your project's root before building for iOS.
Implementing Progression Systems That Scale on iOS
Progression systems are the backbone of retention in mobile games. On iOS, where users expect smooth, responsive UI and instant feedback, a poorly optimized leveling system can tank your App Store rating. The Advanced Leveling System was built specifically to address this: it uses a ScriptableObject-driven architecture that calculates experience curves once at edit time, not every frame on the device.
Drag-and-Drop Leveling in Under 5 Minutes
- Import the Advanced Leveling System from the Unity Asset Store
- Right-click in your Project window and create a
LevelingConfigScriptableObject - Define your XP curve using the built-in curve editor (supports linear, exponential, and custom AnimationCurves)
- Attach the
LevelableEntitycomponent to your player GameObject - Drag your LevelingConfig into the component's config slot
- Call
entity.AddExperience(amount)from your combat or quest system
This workflow eliminates the need to write a single line of XP calculation code. The system handles level-up events, stat modifications, and even UI notifications through UnityEvents — all of which are AOT-safe and tested on iOS devices from iPhone 8 through iPhone 15 Pro Max.
| Progression Feature | Hand-Coded Approach | Drag-and-Drop (Advanced Leveling System) |
|---|---|---|
| XP Curve Definition | Hard-coded formula in C#; requires recompile to tweak | Visual AnimationCurve editor; tweakable at runtime for testing |
| Level-Up Events | Manual event wiring; risk of missing references | UnityEvent slots; drag-and-drop in Inspector |
| Save/Load | Custom serialization; version migration headaches | Built-in JSON/PlayerPrefs integration; version-tolerant |
| iOS Memory Footprint | Variable; depends on developer optimization | Pre-optimized; struct-based data containers to minimize GC |
Optimizing Spawning and Object Pooling for iOS Performance
Nothing kills an iOS game's frame rate faster than frequent Instantiate() and Destroy() calls. Apple's Metal graphics API is fast, but it can't compensate for the garbage collection spikes caused by naive spawning. The Spawner Advanced & Pooling system solves this with a generational pool architecture that pre-allocates objects and recycles them without heap allocations.
"Object pooling isn't an optimization technique — it's a requirement for iOS games. A single frame spike during a critical gameplay moment can get your app rejected for poor performance."
— Unity iOS Performance Best Practices
The system supports wave-based spawning, which is particularly effective on iOS because it allows you to pre-warm pools during natural gameplay lulls (like between waves), rather than during intense action. Here's how to set it up for a typical iOS endless runner or bullet hell game:
- Create a
PoolConfigasset defining your enemy prefabs and pool sizes - Add the
WaveSpawnercomponent to an empty GameObject in your scene - Design wave patterns using the visual timeline editor
- Set pool pre-warming to occur during your loading screen (see the Advanced Loading Screen integration)
- On iOS, limit total pooled objects to under 200 for iPhone 8-class devices; the system's built-in profiler labels help identify over-allocation
On iOS devices with the A12 Bionic chip or newer, the Spawner Advanced & Pooling system can comfortably manage 500+ pooled objects at 60 FPS, thanks to Unity's ECS-adjacent data layout that maximizes CPU cache hits. Always profile on your minimum target device, not just your development iPhone 15 Pro.
Generating Native-Quality UI with Icon Architect Studio
iOS users expect a level of UI polish that can be daunting for developers without dedicated artists. The Icon Architect Studio bridges this gap by transforming your 3D models into production-ready 2D icons directly within Unity. This isn't just a convenience tool — it's a pipeline optimization that ensures your UI assets match your game's visual identity without round-tripping through external tools like Photoshop or Blender.
Automated Icon Pipeline for iOS App Icons and In-Game UI
Apple requires a dozen icon sizes for App Store submission, from 20x20pt to 1024x1024pt. Icon Architect Studio automates this with a one-click export that generates every required size from a single 3D model setup. But its real power for in-game UI is the batch processing capability: select all your inventory item models, weapon prefabs, or character portraits, and generate consistent, styled 2D sprites in seconds.
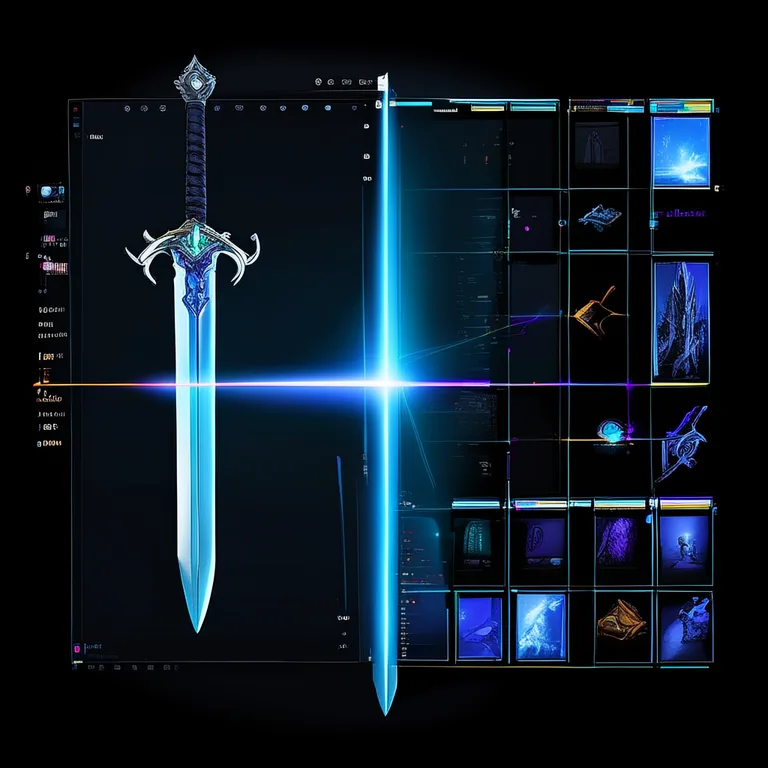
This directly accelerates iOS development by eliminating the "UI asset bottleneck" — that moment when gameplay is done but the UI looks placeholder. With Icon Architect Studio, you iterate on icon styles as fast as you iterate on code, keeping your project moving toward App Store submission.
Multiplayer Networking on iOS with RNet RPC
Real-time multiplayer on iOS introduces challenges beyond standard networking: cellular network variability, strict background execution limits, and Apple's requirement that multiplayer games function reliably across Wi-Fi and cellular. The RNet RPC library was architected specifically for these constraints, prioritizing reliable communication with automatic reconnection and state synchronization that survives iOS app suspension.
Architecting a Reliable iOS Multiplayer Stack
Traditional Unity networking (UNet, Mirror) often assumes a stable desktop-class connection. RNet RPC takes a different approach: it treats packet loss and latency spikes as the default state, not the exception. This makes it ideal for iOS games where players might switch from Wi-Fi to 5G mid-match.
| Networking Concern | Standard Unity Networking | RNet RPC Optimized for iOS |
|---|---|---|
| Connection Loss Handling | Immediate disconnect; manual reconnection logic required | Automatic reconnection with state sync; survives 30-second iOS suspension |
| Cellular Network Optimization | No specific handling; assumes stable bandwidth | Adaptive packet size; reduces overhead on high-latency cellular |
| Background Execution | Connection drops when app is backgrounded | Graceful suspension; resumes with delta state update |
| AOT/IL2CPP Compatibility | Often requires extensive link.xml configuration | Pre-configured for IL2CPP; no reflection-based serialization |
For a turn-based game, RNet RPC's reliable command pattern ensures that no player action is lost, even if the player's train enters a tunnel. For real-time games, its UDP-based movement sync with TCP-like reliability for critical events hits the sweet spot for iOS's networking stack. The RealSoft Games RNet documentation provides complete iOS-specific setup guides, including how to configure Apple's ATS (App Transport Security) requirements.
Cross-Platform Considerations: Writing Once, Deploying to iOS and Beyond
While this tutorial focuses on iOS, the drag-and-drop systems discussed here are inherently cross-platform. The same Advanced Leveling System configuration that drives your iOS RPG works identically on Android, PC, and WebGL builds. The key is understanding where platform-specific optimization is necessary and where abstraction suffices.
Platform-Specific Optimizations in a Unified Codebase
Use Unity's platform-dependent compilation to inject iOS-specific optimizations without forking your codebase. For example, the Spawner Advanced & Pooling system automatically reduces default pool sizes when UNITY_IOS is defined, respecting the tighter memory constraints of older iPhones while allowing newer devices to use the full pool capacity.
This approach — building with cross-platform drag-and-drop systems and adding platform-specific tweaks via compilation flags — is the most efficient path for indie studios targeting iOS alongside other platforms. It's the architecture used by projects like Virtual Sim Story: Home & Life, which ships on both iOS and Android from a single Unity project using RealSoft's modular systems.
Technical Documentation as a Development Accelerator
Well-structured documentation doesn't just help you learn a system — it serves as a design reference that shapes how you architect your own game. The RealSoft Games documentation hub exemplifies this: each tutorial is structured as a step-by-step integration guide that implicitly teaches architectural patterns like separation of concerns, dependency injection via ScriptableObjects, and event-driven communication.
When you follow the Advanced Loading Screen tutorial, you're not just learning how to display a loading bar. You're absorbing patterns for asynchronous scene loading, progress reporting interfaces, and how to structure additive scene workflows — all of which apply to any iOS game with multiple scenes. This "documentation as education" philosophy means that each drag-and-drop asset you integrate makes you a better Unity developer, not just a faster one.
Putting It All Together: A Sample iOS Game Architecture
Let's synthesize everything into a concrete architecture for a hypothetical iOS action RPG — the kind of game that would take a solo developer 6-8 months to build from scratch. With the drag-and-drop systems covered here, the core systems can be integrated in under two weeks.
System Integration Map
| Game System | Drag-and-Drop Asset | Integration Points |
|---|---|---|
| Loading Screen | Advanced Loading Screen | Pre-warms object pools during load; displays tips from ScriptableObject |
| Player Progression | Advanced Leveling System | Receives XP from Spawner enemy kills; triggers Achievement checks |
| Enemy Spawning | Spawner Advanced & Pooling | Pools pre-warmed by Loading Screen; awards XP on death |
| Achievements | Advanced Achievement System | Listens to Leveling and Spawner events; unlocks via UnityEvents |
| UI Icons | Icon Architect Studio | Generates achievement icons, item sprites, and skill icons from 3D assets |
| Multiplayer (optional) | RNet RPC | Syncs level-up events and spawn waves across iOS devices |
This architecture demonstrates the power of modular, drag-and-drop thinking: each system is independently testable, replaceable, and optimized for iOS. If you decide to add multiplayer later, RNet RPC integrates with the existing Leveling and Spawner events without requiring a rewrite of those systems. If Apple releases a new iPhone with different performance characteristics, you adjust pool sizes in one place, not across scattered spawning code.
Frequently Asked Questions
Q: How do I start iOS game development with Unity if I'm a complete beginner?
A: Begin by installing Unity Hub and the latest LTS version of Unity with iOS Build Support checked. Follow a structured iOS development tutorial like this one to learn modular architecture. Start with a simple drag-and-drop system like the Advanced Achievement System — it requires no coding to integrate and teaches you Unity's component-based workflow. Build and deploy to an actual iPhone as early as possible; the simulator is useful but doesn't reflect real device performance or touch input accurately.
Q: What's the best way to optimize Unity games for older iPhones like the iPhone 8?
A: Focus on three areas: object pooling (use Spawner Advanced & Pooling to eliminate runtime Instantiate calls), UI draw calls (batch icons generated by Icon Architect Studio into atlases), and scripting overhead (use IL2CPP with careful link.xml configuration). Profile on the actual device using Unity's Profiler connected via USB — never trust editor statistics. Limit total pooled objects to under 200 and keep particle systems below 50 active particles simultaneously.
Q: Can I really build a complete iOS game using only drag-and-drop assets?
A: You can build approximately 80% of a typical mobile game's systems using well-architected drag-and-drop assets. The remaining 20% is your unique gameplay logic, which you'll write in C# and connect to the modular systems via UnityEvents and public APIs. This iOS development tutorial demonstrates the pattern: use RealSoft Games products for progression, spawning, achievements, and UI generation, then focus your custom code on what makes your game special — combat mechanics, puzzle logic, or narrative systems.
Q: Why should I use IL2CPP instead of Mono for iOS builds?
A: Apple requires all apps to use ARM64 native code, which IL2CPP provides by converting your C# to C++ and compiling it with Clang. Mono (the JIT compiler) is not allowed on the App Store. IL2CPP also provides better performance and security. However, it can strip unused code aggressively, which may break drag-and-drop systems that use reflection. Always use the link.xml files provided with assets like the Advanced Leveling System to preserve necessary types.
Q: How do I handle App Store rejection due to performance issues?
A: Most performance-related rejections stem from excessive memory usage or frame rate drops during core gameplay. Use Unity's Memory Profiler to identify leaks — drag-and-drop systems with built-in pooling (like Spawner Advanced) significantly reduce this risk. Set a strict frame budget: 60 FPS on iPhone 8 as your baseline, with vsync enabled. Test on the oldest device you support, not the newest. If you're using networked features, ensure they degrade gracefully on cellular connections; RNet RPC handles this automatically.
Q: How do I integrate multiple drag-and-drop systems without conflicts?
A: Follow the integration map in this tutorial: each system communicates through UnityEvents and ScriptableObject channels, not direct references. The Advanced Leveling System doesn't need to know about the Spawner — it just exposes an AddExperience method. Your spawner calls that method on enemy death. This loose coupling means systems can be added, removed, or replaced without cascading changes. Refer to the RealSoft Games documentation for each asset's specific integration points and event signatures.
This iOS development tutorial has walked you through a complete, production-tested approach to building iOS games in Unity using drag-and-drop modular systems. From setting up your project with IL2CPP and proper code stripping to integrating progression, spawning, UI generation, and multiplayer networking, the architecture presented here is designed to get your game from concept to App Store submission in record time. The key insight is that modern Unity development isn't about writing more code — it's about composing battle-tested, iOS-optimized systems and focusing your creative energy on the gameplay that makes your title unique. Start with the Advanced Leveling System or Advanced Achievement System today, and experience how much faster iOS development can be when you're assembling, not reinventing.